Mac OSX setup
Mac
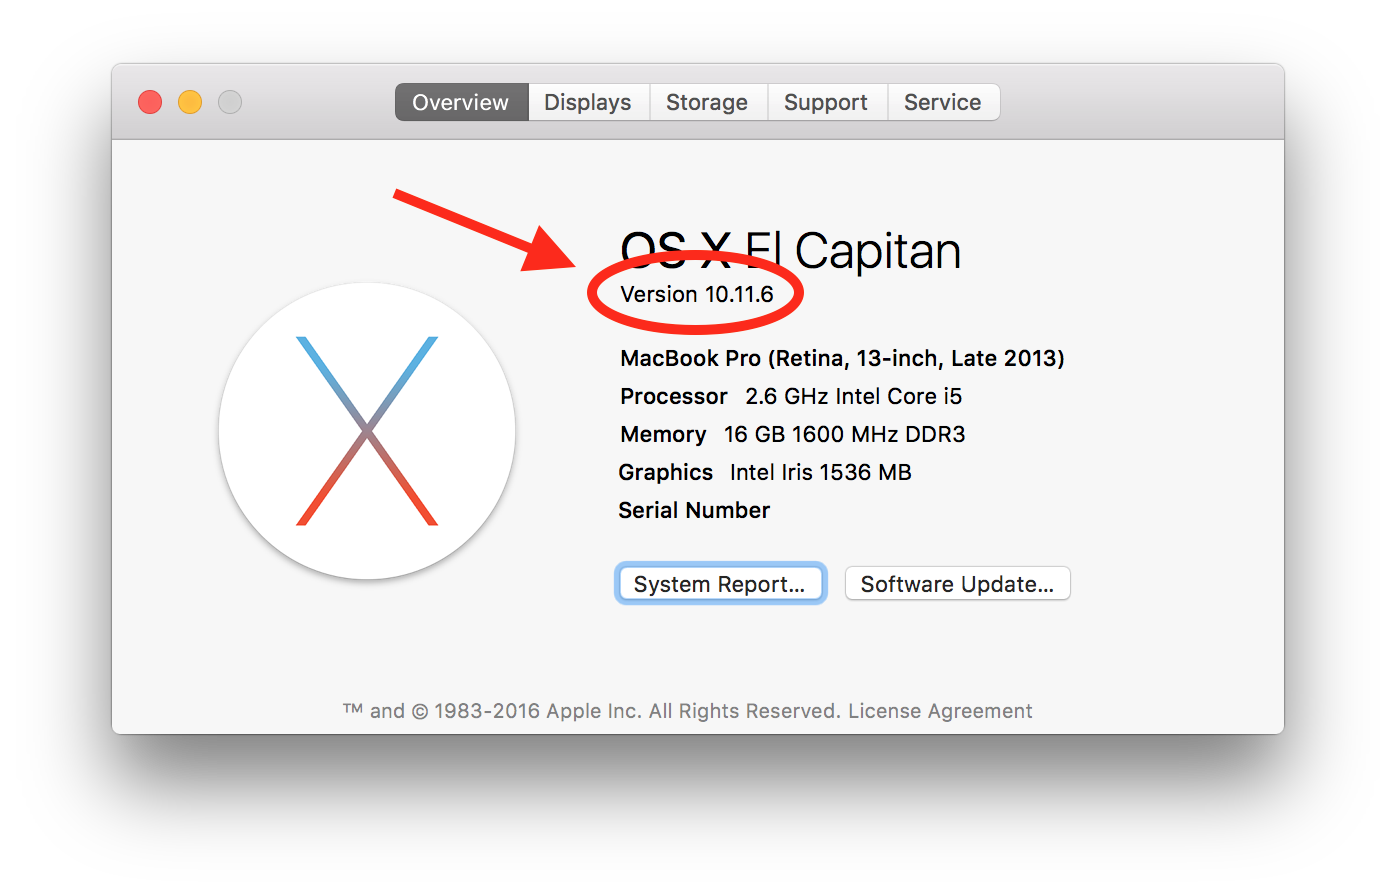
Step 1: Learn your Mac OS X Version
- Click on the Apple icon in the top left of your screen.
- Select “About This Mac”
- In the window that comes up, under the title “Mac OS X” there will be a version number.

If you have 10.9 or above, you’re good to go. Otherwise, flag down a volunteer, and they’ll help you with the next steps. If you’re reading this in advance, now is a good time to upgrade.
Step 2: Install Xcode Command Line tools
Xcode Command Line Tools include lots of tools your computer needs to set up new software.
Step 2.1: Open the Terminal
Open your Applications folder, then look for the Utilities folder and open it. Open the Terminal application.
We’ll be using Terminal a lot so you may want to add it to your dock. You can also launch Terminal using Spotlight search and searching for “terminal”.
Step 2.2: Check to see if you have the tools installed already
Type this in the terminal:
gcc --version
Expected result:
Configured with: --prefix=/Library/Developer/CommandLineTools/usr --with-gxx-include-dir=/usr/include/c++/4.2.1
Apple LLVM version 6.0 (clang-600.0.54) (based on LLVM 3.5svn)
Target: x86_64-apple-darwin14.0.0
Thread model: posix
If you see something about Darwin and LLVM, you are good to go. If not, use one of the steps below to install the tools. Come back afterwards and run this command again to make sure it works!
If you see something about Darwin and LLVM, you are good to go. If not, use one of the steps below to install the tools. Come back afterwords and run this command to make sure it works!
Step 2.3: Run the xcode-select command
You can install these tools by trying to run a command that requires them.
Type this in the terminal:
xcode-select --install
Step 2.4: Install the tools
Click on the “Install” button. When the download finishes, go back and run the test to make sure it works.
Step 3: Install Homebrew
Type this in your terminal to see if you already have homebrew:
brew -v
If you see a response like this (your version number might be different):
Homebrew 0.9.9
then you already have Homebrew and you can skip this section! If you do not see a response with a version of Homebrew, and instead see something like “Command not found”, then you should install Homebrew. To do so, type this in the terminal:
ruby -e "$(curl -fsSL https://raw.githubusercontent.com/Homebrew/install/master/install)"
You may have to press ‘ENTER’ when prompted and type in your password.
If that doesn’t work, visit https://github.com/Homebrew/homebrew/wiki/installation and follow the instructions there.
Check:
Type this in the terminal:
brew -v
Approximate expected result:
Homebrew 0.9.9
Step 4: Install Postgres
Type this in the terminal:
brew install postgresql
If this is your first time installing Postgres with Homebrew, you’ll need to create a database.
Type this into the terminal:
initdb /usr/local/var/postgres -E utf8
Now you will need to create a user for your Database
Type the following into the terminal:
createuser -s postgres
Next type this into the terminal:
brew services start postgresql
Next step:
Go on to Windows setup.
Or:
Go back to Choose your own operating system.
